Hướng dẫn cách cài đặt & tối ưu ComfyUI trên Linux ( có card Nvidia)
Tài liệu hướng dẫn cài đặt ComfyUI cho việc chạy các mô hình AI local.

 @ArchonD
Tài liệu này tổng hợp quy trình chuẩn để cài đặt ComfyUI trên môi trường Linux ( distro chủ bài viết đang sử dụng là CachyOS), sử dụng trình quản lý gói tốc độ cao uv, cấu hình CUDA 13.0, tích hợp sẵn các Custom Nodes thông dụng và tối ưu hóa cho các dòng card đồ họa có mức VRAM thấp.
Ngoài ra, các phiên bản này là phiên bản được lựa chọn chạy ổn định, nếu có ý định thay đổi phiên bản thì làm lại từ bước đầu tiên ( dành cho việc bạn muốn không bị lỗi vặt).
Bước 1: Chuẩn bị môi trường hệ thống:
Kiểm tra đã cài đặt python trên máy/phiên bản python:
python --versionNếu chưa có, có thể cài đặt bằng lệnh:
curl -LsSf https://astral.sh/uv/install.sh | sh
source $HOME/.local/bin/env
uv python install 3.14.7 --default
Kiểm tra lại:
python --version
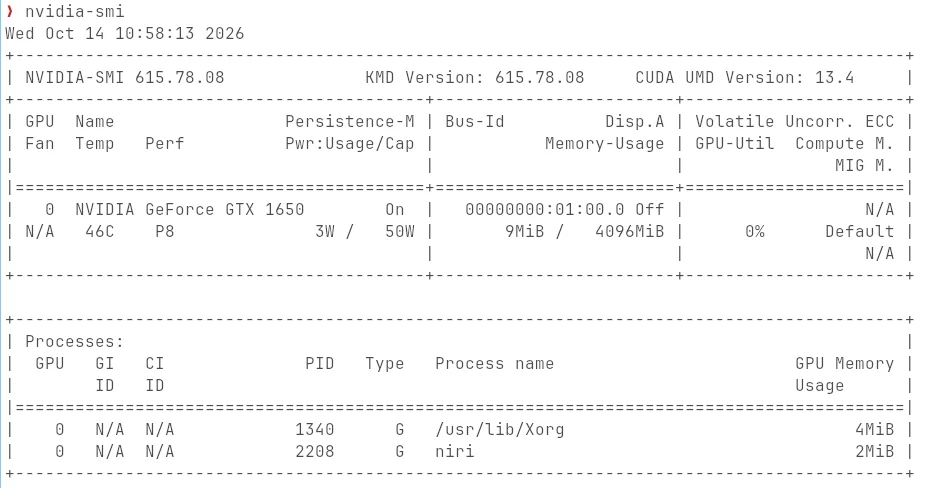
Kiểm tra card đồ hoạ :
nvidia-smiNếu hiển thị tương đối như hình sau là đúng:
Cài đặt pip, git:
sudo pacman -Syu git python-pipKiểm tra lại :
git --version
pip --version
Bước 2: Tải mã nguồn và khởi tạo môi trường ảo ( venv):
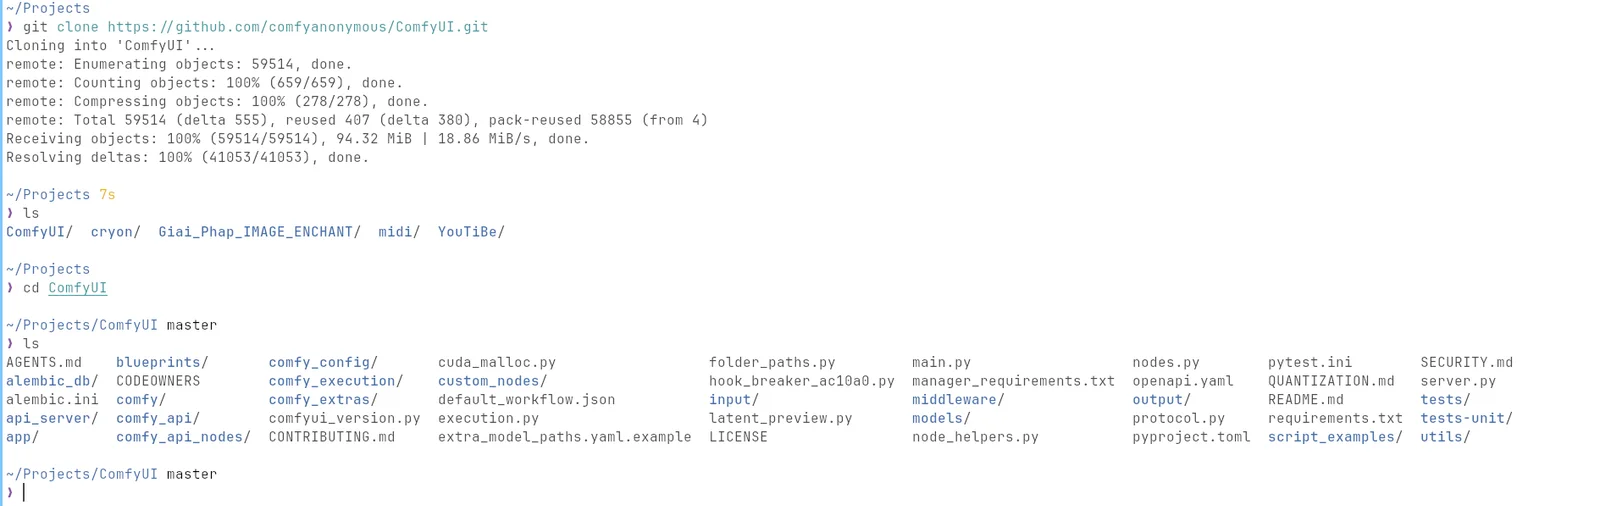
Clone kho lưu trữ ComfyUI vào thư mục dự án:
cd ~/Projects
git clone https://github.com/comfyanonymous/ComfyUI.git
cd ComfyUI
ls
Kết quả:
Tạo môi trường ảo (venv):
python3 -m venv venvNếu bạn sử dụng fish shell:
source venv/bin/activate.fishNếu bạn sử dụng Bash/Zsh:
source venv/bin/activateKiểm tra lại:
which python3
which pip
Nếu hiển thị như /home/<tên user của bạn>/Projects/ComfyUI/venv/bin/python3
thì tức là đã đúng.
Bước 3: Cài đặt CUDA 13.0, PyTorch và các thư viện trong venv qua pip:
Cài đặt CUDA 13.0:
pip install --upgrade pip
pip install uv==0.13.0 virtualenv
python3 -m uv pip install cuda-toolkit==13.0.3.0 cuda-bindings==13.3.1 cuda-pathfinder==1.8.1
Kiểm tra lại:
pip --version
uv --version
virtualenv --version
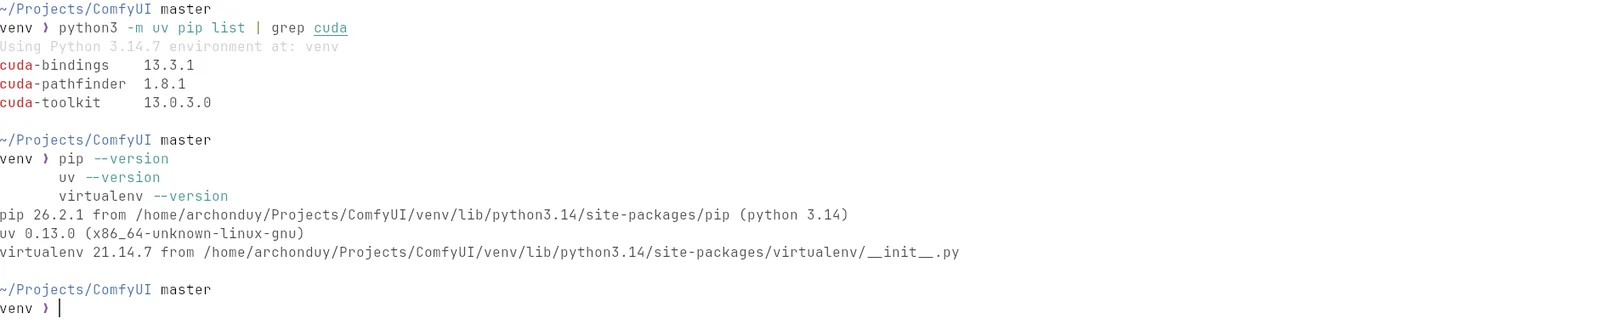
python3 -m uv pip list | grep cuda
Nếu hiển thị tương tự như sau là đúng:
Cài đặt PyTorch:
python3 -m uv pip install torch==2.14.0 torchvision==0.29.0 torchaudio==2.11.0 triton==3.8.0 --extra-index-url https://download.pytorch.org/whl/cu130Kiểm tra lại:
python3 -c "import torch; print('PyTorch version:', torch.__version__, '| CUDA available:', torch.cuda.is_available(), '| Device name:', torch.cuda.get_device_name(0) if torch.cuda.is_available() else 'None')"Nếu hiện tương tự như sau là đúng:

Cài đặt thư viện phụ thuộc:
python3 -m uv pip install aiofiles==25.1.0 aiohappyeyeballs==2.7.1 aiohttp==3.14.3 aiohttp-socks==0.12.0 aiosignal==1.4.0 alembic==1.19.2 annotated-doc==0.0.5 annotated-types==0.8.0 anyio==4.15.1 attrs==26.1.0 av==18.1.0 blake3==1.0.9 certifi==2026.7.22 cffi==2.1.1 chardet==7.6.0 charset-normalizer==3.5.1 click==8.5.0 comfy-aimdo==0.5.2 comfy-angle==0.1.1 comfy-kitchen==0.2.33 comfyui-embedded-docs==0.5.11 comfyui-frontend-package==1.51.10 comfyui-workflow-templates==0.11.55 comfyui-workflow-templates-core==0.3.333 comfyui-workflow-templates-json==0.1.68 comfyui-workflow-templates-media-api==0.3.84 comfyui-workflow-templates-media-assets-01==0.1.39 comfyui-workflow-templates-media-image==0.3.160 comfyui-workflow-templates-media-other==0.3.229 comfyui-workflow-templates-media-video==0.3.101 cryptography==50.0.2 cuda-bindings==13.3.1 cuda-pathfinder==1.8.1 cuda-toolkit==13.0.3.0 einops==0.8.2 filelock==3.32.5 flatbuffers==25.12.19 frozenlist==1.8.0 fsspec==2026.7.0 gitdb==4.0.12 gitpython==3.2.0 greenlet==3.5.5 h11==0.16.0 h2==4.4.1 hf-xet==1.6.0 hpack==4.2.0 httpcore==1.0.9 httpx==0.28.1 huggingface-hub==1.30.0 hyperframe==6.1.0 idna==3.19 jinja2==3.1.6 jsonschema==4.26.0 jsonschema-specifications==2025.9.1 kornia==0.8.3 kornia-rs==0.1.14 mako==1.4.1 markdown-it-py==4.2.0 markupsafe==3.0.3 matrix-nio==0.26.0 mdurl==0.1.2 mpmath==1.3.0 multidict==6.7.1 networkx==3.6.1 nh3==0.3.7 numpy==2.5.3 onnxruntime==1.31.0 packaging==26.3 pillow==12.3.0 potracer==0.0.4 propcache==0.5.2 protobuf==7.36.2 psutil==7.2.2 pycparser==3.11 pycryptodome==3.24.1 pydantic==2.13.5 pydantic-core==2.46.5 pydantic-settings==2.15.0 pygithub==2.10.0 pygments==2.21.0 pyjwt==2.15.1 pymupdf==1.28.2 pynacl==1.6.2 pyopengl==3.1.10 python-dotenv==1.2.3 python-socks==3.1.1 pyyaml==6.0.3 referencing==0.37.0 regex==2026.9.3 requests==2.34.2 rich==15.0.0 rpds-py==2026.9.1 safetensors==0.8.0 scipy==1.18.1 sentencepiece==0.2.2 setuptools==84.0.0 shellingham==1.5.4 simpleeval==1.0.7 smmap==5.0.3 spandrel==0.4.2 sqlalchemy==2.0.52 sympy==1.14.0 tokenizers==0.23.2 toml==0.10.2 torchsde==0.2.6 tqdm==4.70.0 trampoline==0.1.2 transformers==5.16.1 typer==0.27.2 typing-extensions==4.16.0 typing-inspection==0.4.4 unpaddedbase64==2.1.0 urllib3==2.7.0 vtracer==0.6.15 yarl==1.24.5
python3 -m uv pip install --upgrade comfy-aimdo
Kiểm tra lại:
python3 -m uv pip show comfy-aimdo
python3 -c "import comfy_aimdo; print('comfy-aimdo loaded successfully')"
Nếu hiện tương tự như hình thì đúng:

Bước 4: Cài đặt ComfyUI Manager trong folder Custom Nodes:
cd custom_nodes
git clone https://github.com/ltdrdata/ComfyUI-Manager.git
Bước 5: Quản lý Checkpoints ( models), VAE, LoRAs, Control Net:
Cần đặt đúng vào các thư mục:
Nếu là Checkpoints ( models):
~/Projects/ComfyUI/models/checkpoints/
Nếu là VAE:
~/Projects/ComfyUI/models/vae/
Nếu là LoRAs:
~/Projects/ComfyUI/models/loras/
Nếu là Control Net:
~/Projects/ComfyUI/models/controlnet/
Bước 6: Khởi chạy & Tối ưu hoá phần cứng:
Lệnh chạy căn bản ( chỉ dùng khi máy bạn đủ yêu cầu phần cứng):
python3 main.pyLệnh chạy tối ưu:
Tránh lỗi cấp phát bộ nhớ:
python3 main.py --disable-cuda-mallocNếu chạy các luồng xử lý nặng và thường xuyên thiếu VRAM:
python3 main.py --disable-cuda-malloc --lowvramSau khi server khởi động, mở trình duyệt và truy cập: http://127.0.0.1:8188
Cẩm nang xử lý lỗi thường gặp:
Lỗi 1: ModuleNotFoundError: No module named 'comfy_aimdo.storage':
Nguyên nhân: Mã nguồn ~/Projects/ComfyUI đang ở bản mới nhất nhưng gói comfy-aimdo trong venv vẫn ở bản 0.5.2.
Khắc phục:
python3 -m uv pip install --upgrade comfy-aimdo comfy-kitchen -r requirements.txtLỗi 2: RuntimeError: ERROR: Could not detect model type of: .../model.safetensors:
Nguyên nhân: File mô hình bị lỗi trong lúc tải về, hoặc đặt nhầm file khác vào thư mục checkpoints.
Khắc phục: Kiểm tra lại dung lượng file, tải lại một Checkpoint hợp lệ vào models/checkpoints/ và nhấn Refresh trên giao diện, kiểm tra lại folder models/checkpoints có dư thừa file nào không hợp lệ (đuôi không phải .safetensors).
Thực hiện bởi: ArchonD
Đang tải bình luận…